Extractors
Overview
Building and Deploying Extractors
Testing Locally with Clowder
A Quick Note on Debugging
Additional pyClowder Examples
Overview
One of the major features of Clowder is the ability to deploy custom extractors for when files are uploaded to the system. A list of extractors is available in GitHub. A full list of extractors is available in Bitbucket.
To write new extractors, pyClowder is a good starting point. It provides a simple Python library to write new extractors in Python. Please see the sample extractors directory for examples. That being said, extractors can be written in any language that supports HTTP, JSON and AMQP (ideally a RabbitMQ client library is available for it).
Clowder capture several events and sends out specific messages for each. Extractors that are registered for a specific event type will receive the message and can then act on it. This is defined in the extractor manifest.
The current list of supported events is:
File uploaded
File added to dataset
File Batch uploaded to dataset
File remove from dataset
Metadata added to file
Metadata remove from file
Metadata added to dataset
Metadata removed from dataset
File/Dataset manual submission to extractor
Building and Deploying Extractors
To create and deploy an extractor to your Clowder instance you’ll need several pieces: user code, clowder wrapping code to help you integrate your code into clowder, an extractor metadata file, and, possibly, a Dockerfile for the deployment of your extractor. With these pieces in place, a user is able to search for their extractor, submit their extractor and have any metadata returned from their extractor stored - all within Clowder.
Although the main intent of an extractor is to interact with a file within Clowder and save metadata associated with said file, Clowder’s ability to interact with files creates a flexibility with extractors that lets users do more than the intended scope. For instance, a user could write an extractor code that reads a file and pushes data to another application, modifies the file, or creates derived inputs within Clowder.
To learn more about extractor basics please refer to the following documentation.
For general API documentation refer here. API documentation for your particular instance of Clowder can be found under Help -> API.
User code
This is code written by you that takes, as input, a file(s) and returns metadata associated with the input file(s).
Clowder Code
We’ve created Clowder packages in Python and Java that make it easier for you to write extractors. These packages help wrap your code so that your extractor can be recognized and run within your Clowder instance. Details on building an extractor can be found at the following links:
extractor_info.json
The extractor_info.json file is a file that includes metadata about your extractor. It allows Clowder to “know” about your extractor. Refer here for more information on the extractor_info.json file.
Docker
To deploy your extractor within Clowder you need to create a Docker container. Docker packages your code with all its dependencies, allowing your code to be deployed and run on any system that has Docker installed. To learn more about Docker containers refer to docker.com. For a useful tutorial on Docker containers refer to katacoda.com. Installing docker requires a minimum of computer skills depending on the type of machine that you are using.
To see specific examples of Dockerfiles refer to the Clowder Code links above or peruse existing extractors at the following links:
If creating a simple Python extractor, a Dockerfile can be generated for you following the instructions on the clowder/generator) repository.
Testing Locally with Clowder
While building your extractor, it is useful to test it within a Clowder instance. Prior to deploying your extractor on development or production clusters, testing locally can help debug issues quickly. Below are some instructions on how to deploy a local instance of Clowder and deploy your extractor locally for quick testing. The following docker commands should be executed from a terminal window. These should work on a linux system with docker installed or on a mac and Windows with Docker Desktop) installed.
Build your docker image: run the following in the same directory as your Dockerfile
docker build -t myimage:tag .
Once your Docker image is built it can now be deployed within Clowder.
docker-compose -f docker-compose.yml -f docker-compose.extractors.yml up -d
Below are examples of each file:
- docker-compose.yml
This file sets up Clowder and its dependencies such as MongoDB and RabbitMQ. You should not have to modify it.
- docker-compose.override.yml
This file overrides defaults, and can be used to customize clowder. When downloading the file, make sure to rename it to docker-compose.override.yml. In this case it will expose clowder, mongo and rabbitmq ports to the localhost.
- docker-compose.extractor.yml
This file deploys your extractor to Clowder. You will have to update this file to reflect your extractor’s name, Docker image name and version tag, and any other requirements like environment variables. See below:
version: '3.5'

services:
  myextractor:
    image: myextractor_imagename:mytag
    restart: unless-stopped
    networks:
      - clowder
    depends_on:
      - rabbitmq
      - clowder
    environment:
      - RABBITMQ_URI=${RABBITMQ_URI:-amqp://guest:guest@rabbitmq/%2F}
      # Add any additional environment variables your code may need here
  # Add multiple extractors below following template above
Initialize Clowder. All the commands below assume that you are running this in a folder called tests, hence the network name tests_clowder. If you ran the docker-compose command in a folder called clowder, the network would be clowder_clowder.
docker run -ti --rm --network tests_clowder clowder/mongo-init
Enter email, first name, last name password, and admin: true when prompted.
Navigate to localhost:9000 and login with credentials you created in step 4.
Create a test space and dataset. Then click ‘Select Files’ and upload (if the file stays in CREATED and never moves to PROCESSED you might need to change the permission on the data folder using docker run -ti –rm –network tests_clowder clowder/mongo-init).
Click on file and type submit for extraction.
It may take a few minutes for you to be able to see the extractors available within Clowder.
Eventually you should see your extractor in the list and click submit.
Navigate back to file and click on metadata.
You should see your metadata present if all worked successfully.
A Quick Note on Debugging
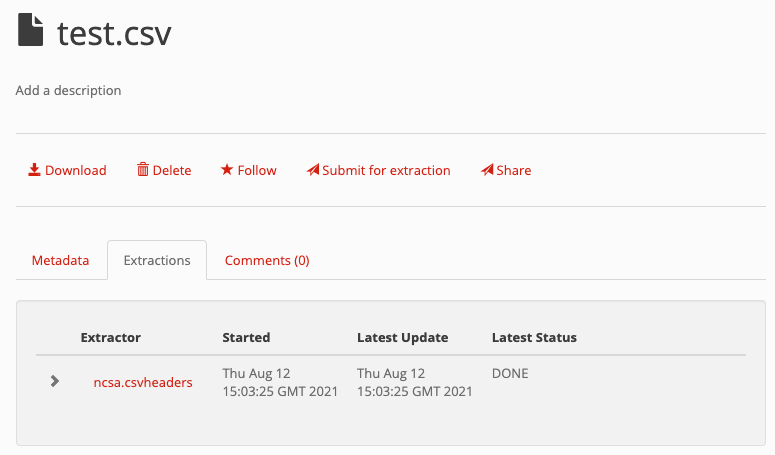
To check the status of your extraction, navigate to the file within Clowder and click on the “Extractions” tab. This will give you a list of extractions that have been submitted. Any error messages will show up here if your extractor did not run successfully.
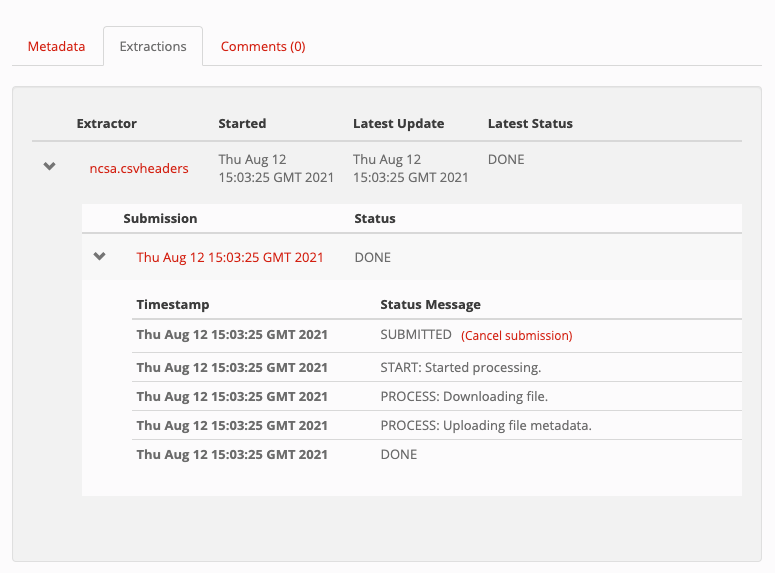
You can expand the tab to see all submissions of the extractor and any error messages associated with the submission:
If your extractor failed, the error message is not helpful, or if you do not see metadata present in the “Metadata” tab for the file you can check the logs of your extractor coming from the docker container by executing the following:
docker log tests_myextractor_1
Replace “myextractor” with whatever name you gave your extractor in the docker-compose.extractors.yml file.
If you want to watch the logs as your extractor is running you can type:
docker logs -f tests_myextractor_1
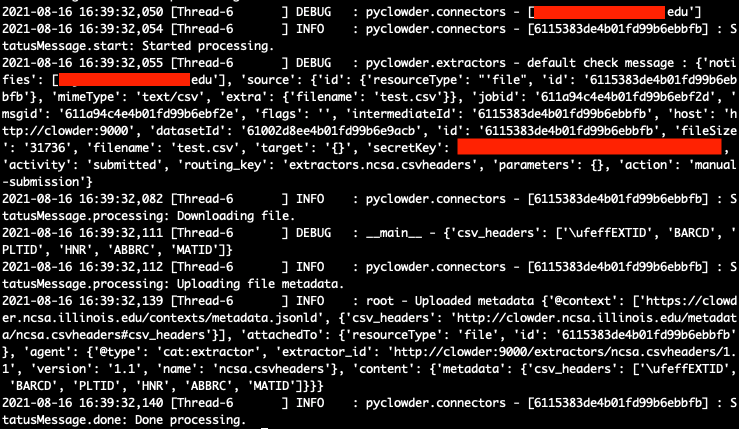
You can print any debugging information within your extractor to the docker logs by utilizing the logging object within your code. The following example is for pyClowder:
logging.info("Uploaded metadata %s", metadata)
In the screenshot above you can see the lines printed out by the logging.info as the line will start with INFO:
2021-04-27 16:47:49,995 [MainThread ] INFO
Additional pyClowder Examples
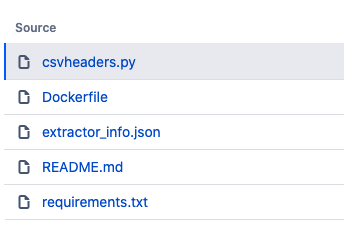
For a simple example of an extractor, please refer to extractor-csv. This extractor is submitted on a csv file and returns the headers as metadata.
Specifying multiple inputs
This example assumes data is within the same dataset.
#!/usr/bin/env python3

import subprocess
import logging

from pyclowder.extractors import Extractor
import pyclowder.files
import pyclowder.datasets

class MyExtractor(Extractor):
        def __init__(self):
                Extractor.__init__(self)
                logging.getLogger('pyclowder').setLevel(logging.DEBUG)
                logging.getLogger('__main__').setLevel(logging.DEBUG)

                # Add an argument to pass second filename with default filename
                self.parser.add_argument('--secondfile',default="my_default_second_file.csv")
                self.setup()

        def process_message(self, connector,host, secret_key,resource, parameters):
                # grab inputfile path
                inputfile = resource["local_paths"][0]

                # get list of files in dataset
                filelist = pyclowder.datasets.get_file_list(connector, host, secret_key, parameters['datasetId'])

                # loop through dataset and grab id of file whose filename matches desired filename
                for file_dict in filelist:
                        if file_dict['filename'] == self.args.secondfile:
                                secondfileID = file_dict['id']

                # or a more pythonic way to do the above loop
                # secondfileId = [file_dict['id'] for file_dict in filelist if file_dict['filename'] == self.args.secondfile][0]

                # download second file "locally" so extractor can operate on it
                secondfilepath = pyclowder.files.download(connector, host, secret_key, secondfileId)

                """
                Execute your function/code to operate on said inputfile and secondfile
                """

                # upload any metadata that code above outputs as "my_metadata"
                metadata = self.get_metadata(my_metadata, 'file', parameters['id'], host)
                pyclowder.files.upload_metadata(connector, host, secret_key, parameters['id'], metadata)

if __name__ == "__main__":
        extractor = MyExtractor()
        extractor.start()
Renaming files
class MyExtractor(Extractor):
        def __init__(self):
                Extractor.__init__(self)
                logging.getLogger('pyclowder').setLevel(logging.DEBUG)
                logging.getLogger('__main__').setLevel(logging.DEBUG)

                # Add an argument to pass second filename with default filename
                self.parser.add_argument('--filename')
                self.setup()

        def rename_file(self, connector, host, key, fileid,filename):
                # rename file
                renameFile= '%sapi/files/%s/filename' % (host, fileid)

                f = json.dumps({"name": filename})

                connector.put(renameFile,
                                        data=f,
                                        headers={"Content-Type": "application/json", "X-API-KEY": key},
                                        verify=connector.ssl_verify if connector else True)

        def process_message(self, connector, host, secret_key,resource, parameters):
                # grab inputfile path
                inputfile = resource["local_paths"][0]

                if self.args.filename:
                        # call rename_file function
                        self.rename_file(connector, host, secret_key, parameters['id'], self.args.filename)

                # upload any metadata that code above outputs as "my_metadata"
                metadata = self.get_metadata(my_metadata, 'file', parameters['id'], host)
                pyclowder.files.upload_metadata(connector, host, secret_key, parameters['id'], metadata)

if __name__ == "__main__":
        extractor = MyExtractor()
        extractor.start()